What is Salesforce Field Service Lightning
Field Service Lightning (FSL) helps in scheduling the correct person or team to complete the work at the customer’s site at the right time.

For example, a customer purchased a washing machine two months ago and now there is a problem with the display panel in the machine. The customer immediately make a call to the call center and explains the problem to the agent then the agent will create a case as per customer complaint and will create a work order from the case related list by entering the details like Service Territory ( Area that customer belongs to), Work type (Type of the work to be completed), start date (when it should be started), End Date (when it should be complete) , Subject, Duration, Duration Type (Hours or Minutes), Priority, Description and customer Address (Street, City, State, Zip, Country).
If the Work Type is selected in the Work Order then the Duration, Duration Type will be auto-populated. If the Auto-Create Service Appointment in the Work type is set to True the system will auto-create the service appointment or Agent has to create and schedule the appointment to the Service Resource by clicking the ‘Book appointment‘ or ‘Candidates’ chatter actions. These chatter actions will work based on Work rules and Scheduling policies. Then the assigned resource will go to the customer’s site as per the schedule and finish the work and complete Service appointment by using the FSL mobile app.
Steps to setup the Field Service Lightning
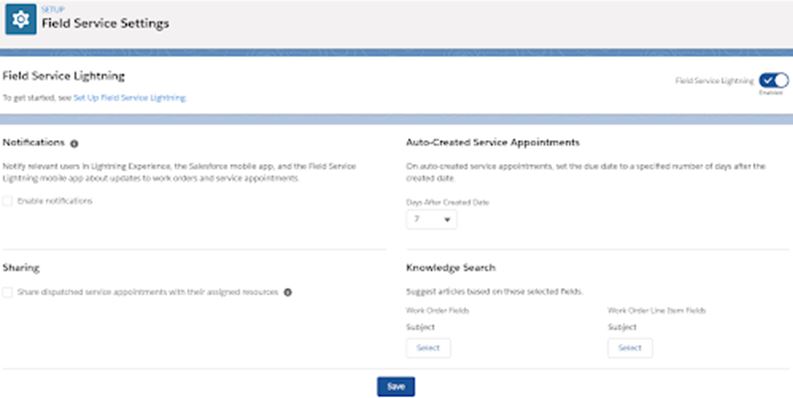
Enable Field Service Lightning
1) Setup ->Field Service Settings → Enable Field Service Lightning
2) In theNotifications section select Enable notifications to send notifications to the user in Salesforce mobile app, and the FSL mobile app about updates to work orders and service appointments
3) In the Auto-Created Service Appointments section select Days After Created Date to set the due date to a specified number of days on auto-created service appointments.
4) In the Sharing section
a) Select Share dispatched service appointments with their assigned resources if the sharing access to service appointment is Private or Public Read Only, to give the Service Appointment edit access to the assigned Service Resource.
b) Select Share service appointments parent work orders with their assigned resources if the sharing access to Work Order is Private or Public Read Only, to give the Work Orders edit access to the assigned Service Resource.
5) In the Knowledge Search section select the Work Order and Work Order Line Item fields to show the suggested Knowledge Articles based on the selected fields and click Save.
Install FSL Managed Package
FSL Managed Package: FSL Managed package is used to get access to the dispatcher console, scheduling tools, and guided setup and FSL related custom objects.
Go to https://fsl.secure.force.com/install and install the managed package in sandbox or Production. Once the installation is completed the Field Service and the Field Service Admin apps were added to the app launcher.
Managed Package settings:
1) Go to Field Service Admin app –> Field Service Settings tab –> Getting Started –> Permission Sets –> On each file click on Create Permissions to create the required permissions for the FSL.
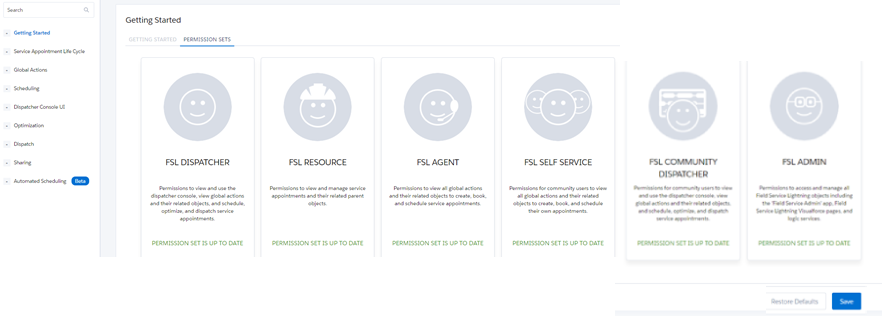
2) Setup –> User –> Admin User –> Permission Sets –> Click on Edit Assignments –> Assign FSL Admin License and FSL Admin Permissions and click on Save.
3) Field Service Admin app –> Field Service Settings tab –> Getting Started –> Click on Go to Guided setup
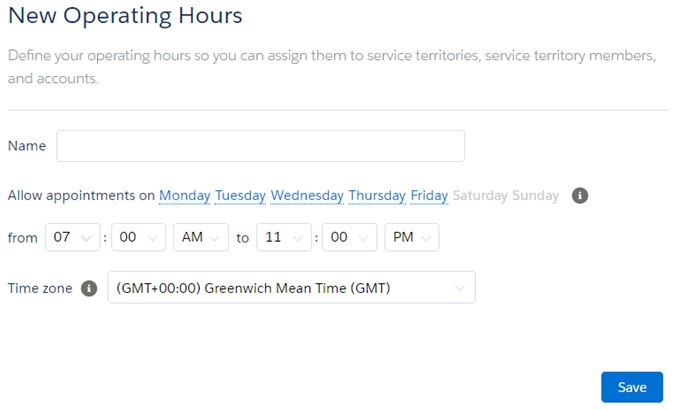
A) Create Service Territories –> Enter Territory Name and click on Add, it will create the Service Territory. If you want to create the New Operating Hours for this Service Territory click onNew Operating Hours link and then enter the Operating Hours name, select the days(Sunday to Saturday) to create Appointments, Select the start and end time to create time slots, select the Time Zone and click on Save and set the newly created operating hours for the Service Territory.
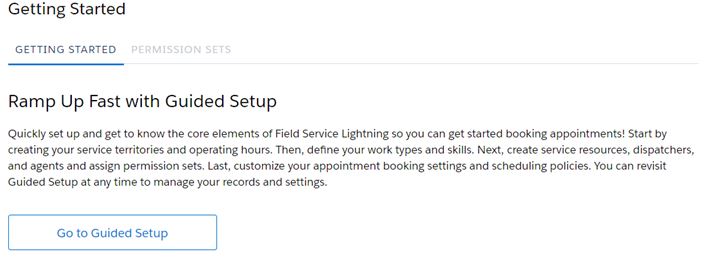
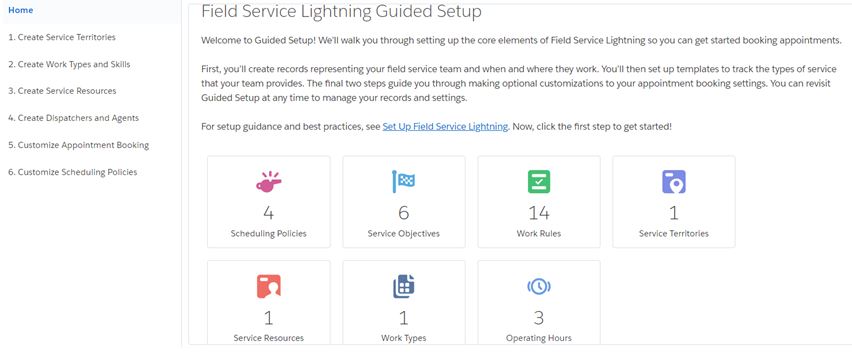

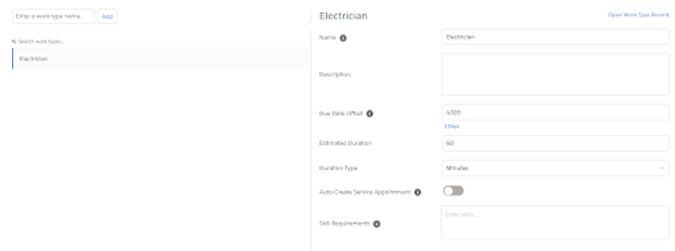
B) Create Work Type and Skills –> Enter Work Type Name and click on Add, It will create the Work Type, Enter the Estimated Duration, Duration Type(Minutes/ Hours), select Auto-Create Service Appointment if required and Enter the Skill Requirement, after entering each skill press enter then the system checks for the existing skills in the system if not found it will give a confirmation message to create the skill.
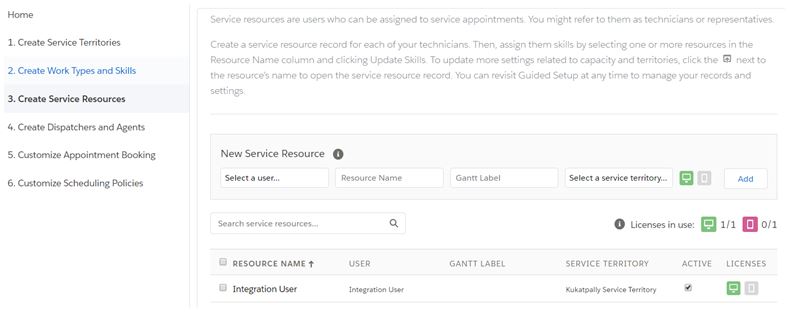
C) Create Service Resource –> Select the user, enter the Resource Name, select the Service Territory, select the license next to the Service Territory and click on Add it will create the Service Resource.
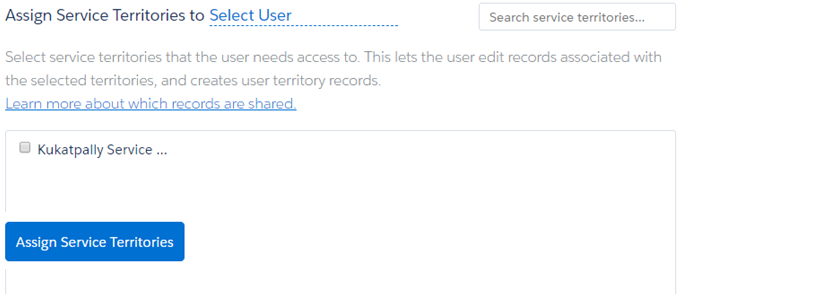
D) Create Dispatchers and Agents –> Select the user and select the Territories that the user belongs to and click on Assign Service Territories, then assign the License by clicking on the desired icon under the License column and the system will assign the selected permissions and License to the user.
E) Customize Appointment Booking –> Select Scheduling Policy, Operating Hours to show the customer appointment slots to choose by using the Book Appointment chatter Action.
F) Customize Scheduling Policies –> Select the desired Scheduling Policy –> Choose the desired Work Rules. These work rules will ignore the service resources that violate any rule while scheduling appointments –> Set the Service objectives by giving weight each objective to indicate its importance.
4) Field Service Admin app –> Field Service Settings tab Global Actions –> Appointment Booking –> choose the default scheduling policy and the operating hours for the Book Appointment and the Candidates global actions, Click on Emergency Wizard to set the Emergency Scheduling policy and click on Save.
5) Optimization: Activate FSL schedule optimization so you can create optimal schedules for your field service team. You can configure optimization to run regularly, or run it manually.
Field Service Admin app –> Field Service Settings tab –> Optimization –> Activation –> Click on Create Optimization Profile, the system will create the FSL optimization user and the FSL optimization profile. Setup –> users –> FSL Optimization User –> Edit –> select Active and Generate new password and notify the user immediately –> click on Logout.
A) Login with the FSL Optimization user with the newly generated password –> Field Service Settings tab –> clicks Activate Optimization –> Click Allow to allow remote site access.
B) To create/update the FSL Optimization scheduled jobs, go to Field Service Settings tab –> Optimization –> Scheduled Jobs –> New Job/ Edit Job –> select the Active, desired service territories, Frequency, Scheduling Policy and click on save. This will create the FSL Optimization jobs to create optimal schedules for the resources.
Need help with Field Service Lightning?
Looking for implementation, customization or support assistance with Salesforce.com Field Service Lightning? We offer a range of services for Salesforce Field service including Field Service Implementation, Optimization, Support, AMC, etc. Contact our team to know more about our Salesforce Field Services Lightning offerings.

